
Coolify does not have a built-in feature to migrate itself from one server to another.
You will need to manually install Coolify on the new server and then copy over your data. This guide walks you through the process step-by-step.
This guide works for migrating a healthy or broken Coolify instance to a new server.
Note
We assume you have a new server ready and Coolify is not yet installed on it.
1. What to Migrate
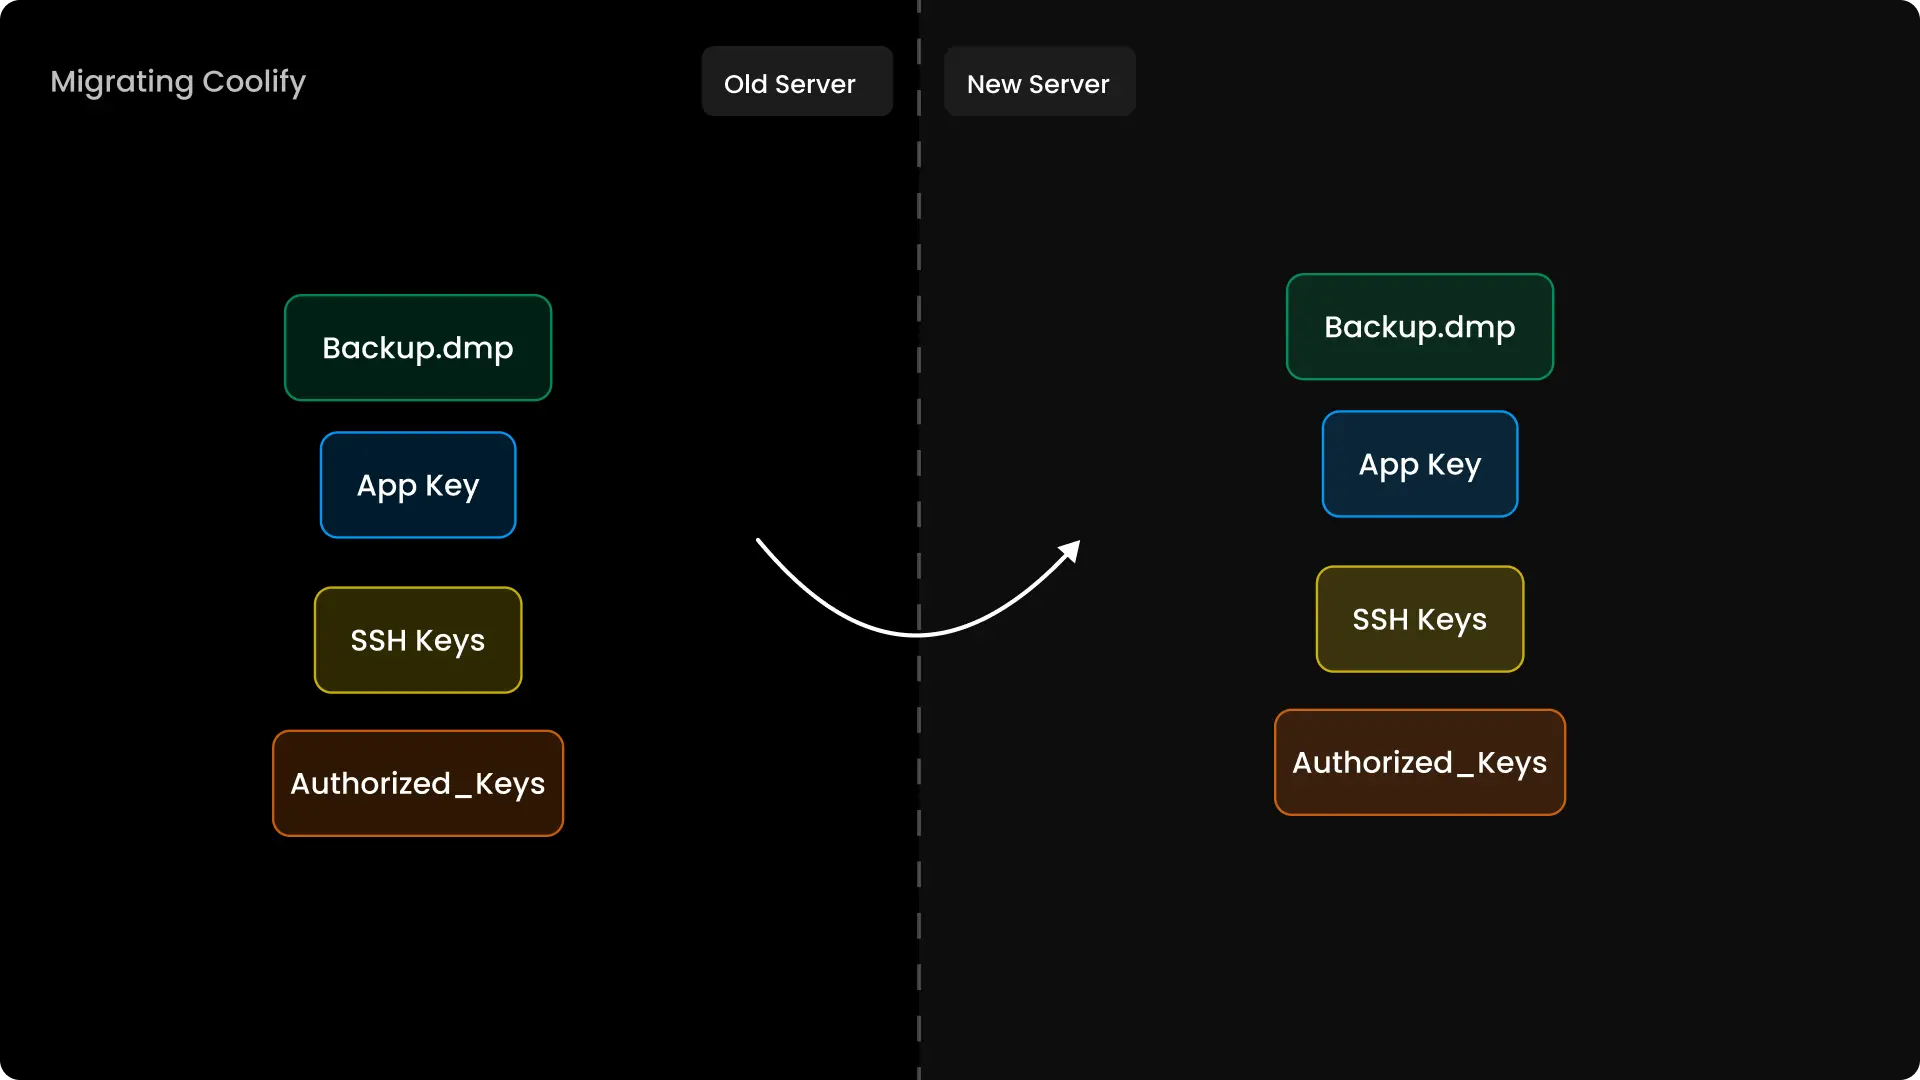
To migrate Coolify, you need to move a few key pieces of data from your old server to the new one:
- Coolify Database: This contains all your project configurations. It runs in a Docker container named
coolify-db. - Application Key (
APP_KEY): This is a secret key used to encrypt your database. Without it, your backup cannot be restored. It is stored in the.envfile. - SSH Keys: Coolify uses these to connect to your servers.
- Authorized Keys: These keys allow your servers to accept SSH connections from Coolify.
This guide will show you how to back up and transfer these items safely.
2. Back Up the Coolify Database
First, you need to back up your Coolify database. All of your instance's data is stored here.
There are three ways to do this:
Note
Use one of the other methods if you cannot access your Coolify dashboard.
Create a Backup
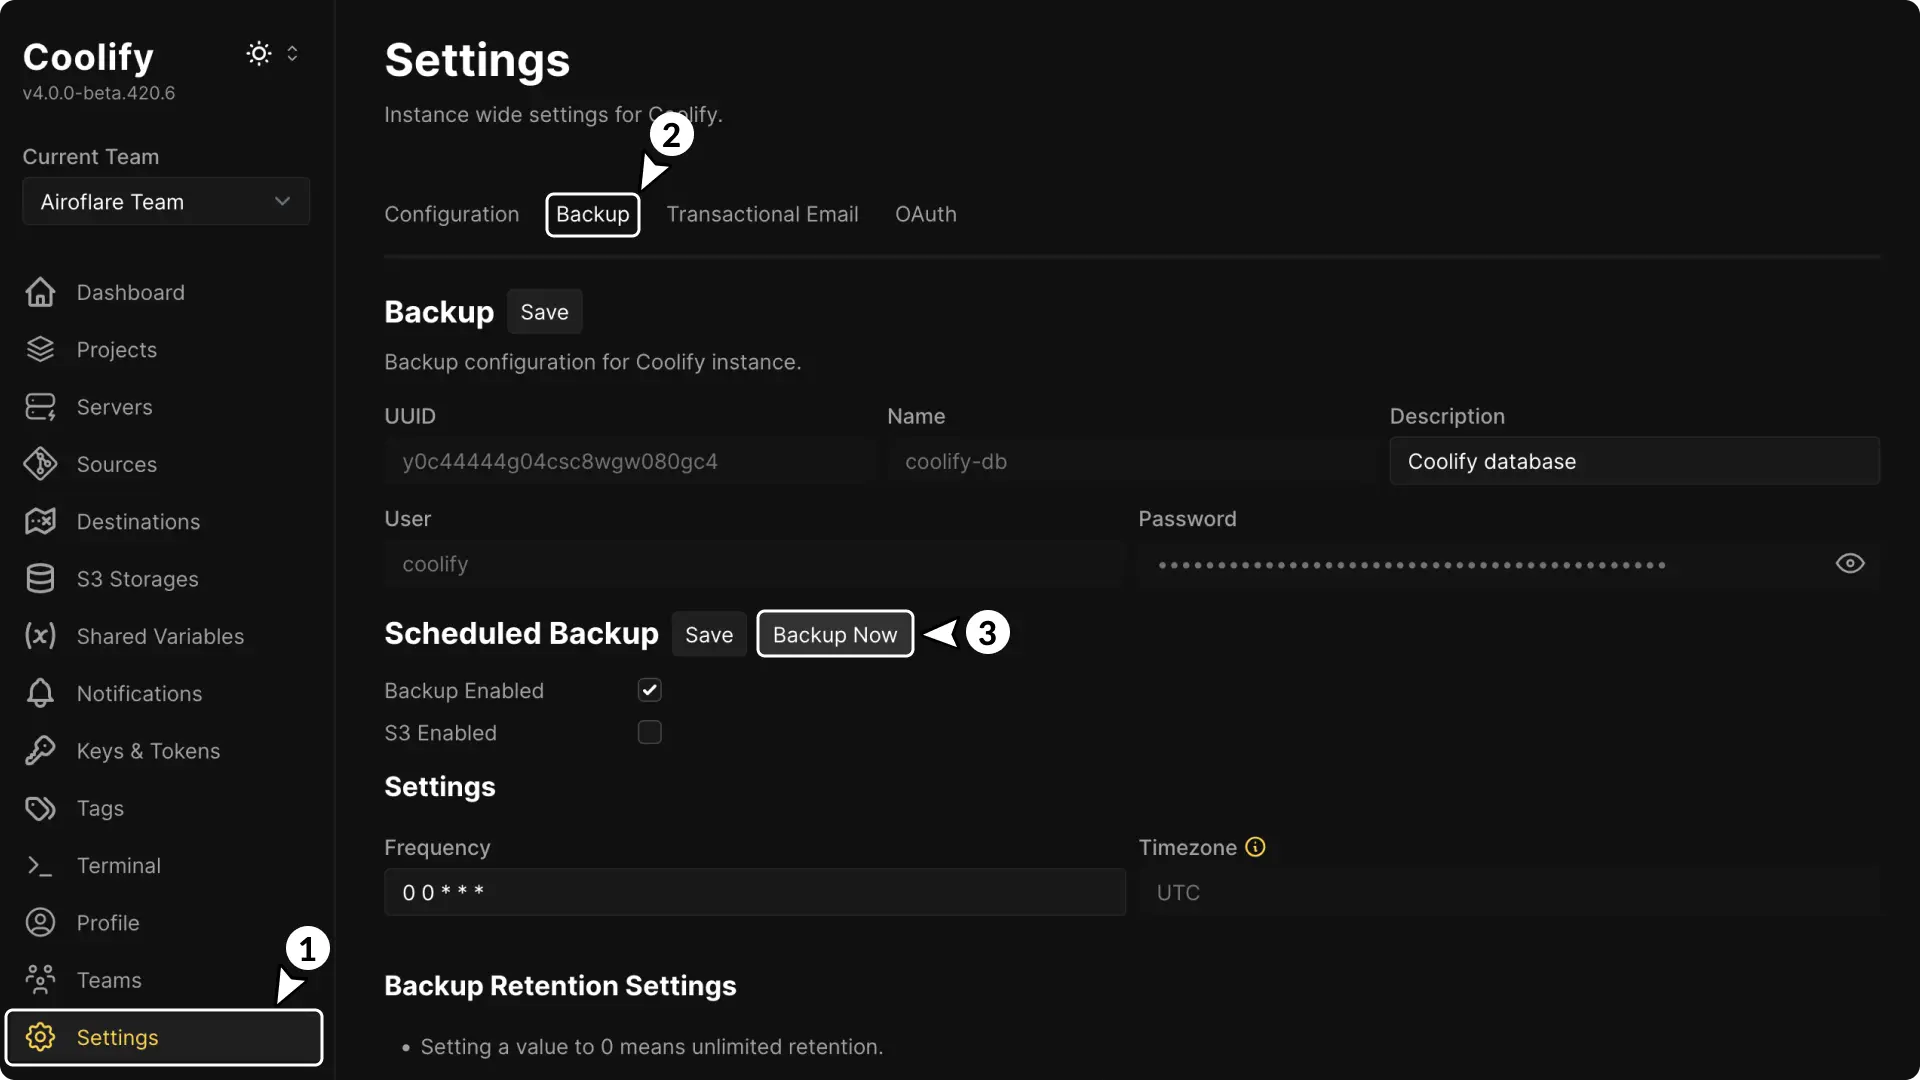
- Log in to your Coolify Dashboard.
- Go to Settings and select the Backup tab.
- Click Backup Now.
Save the Backup Location
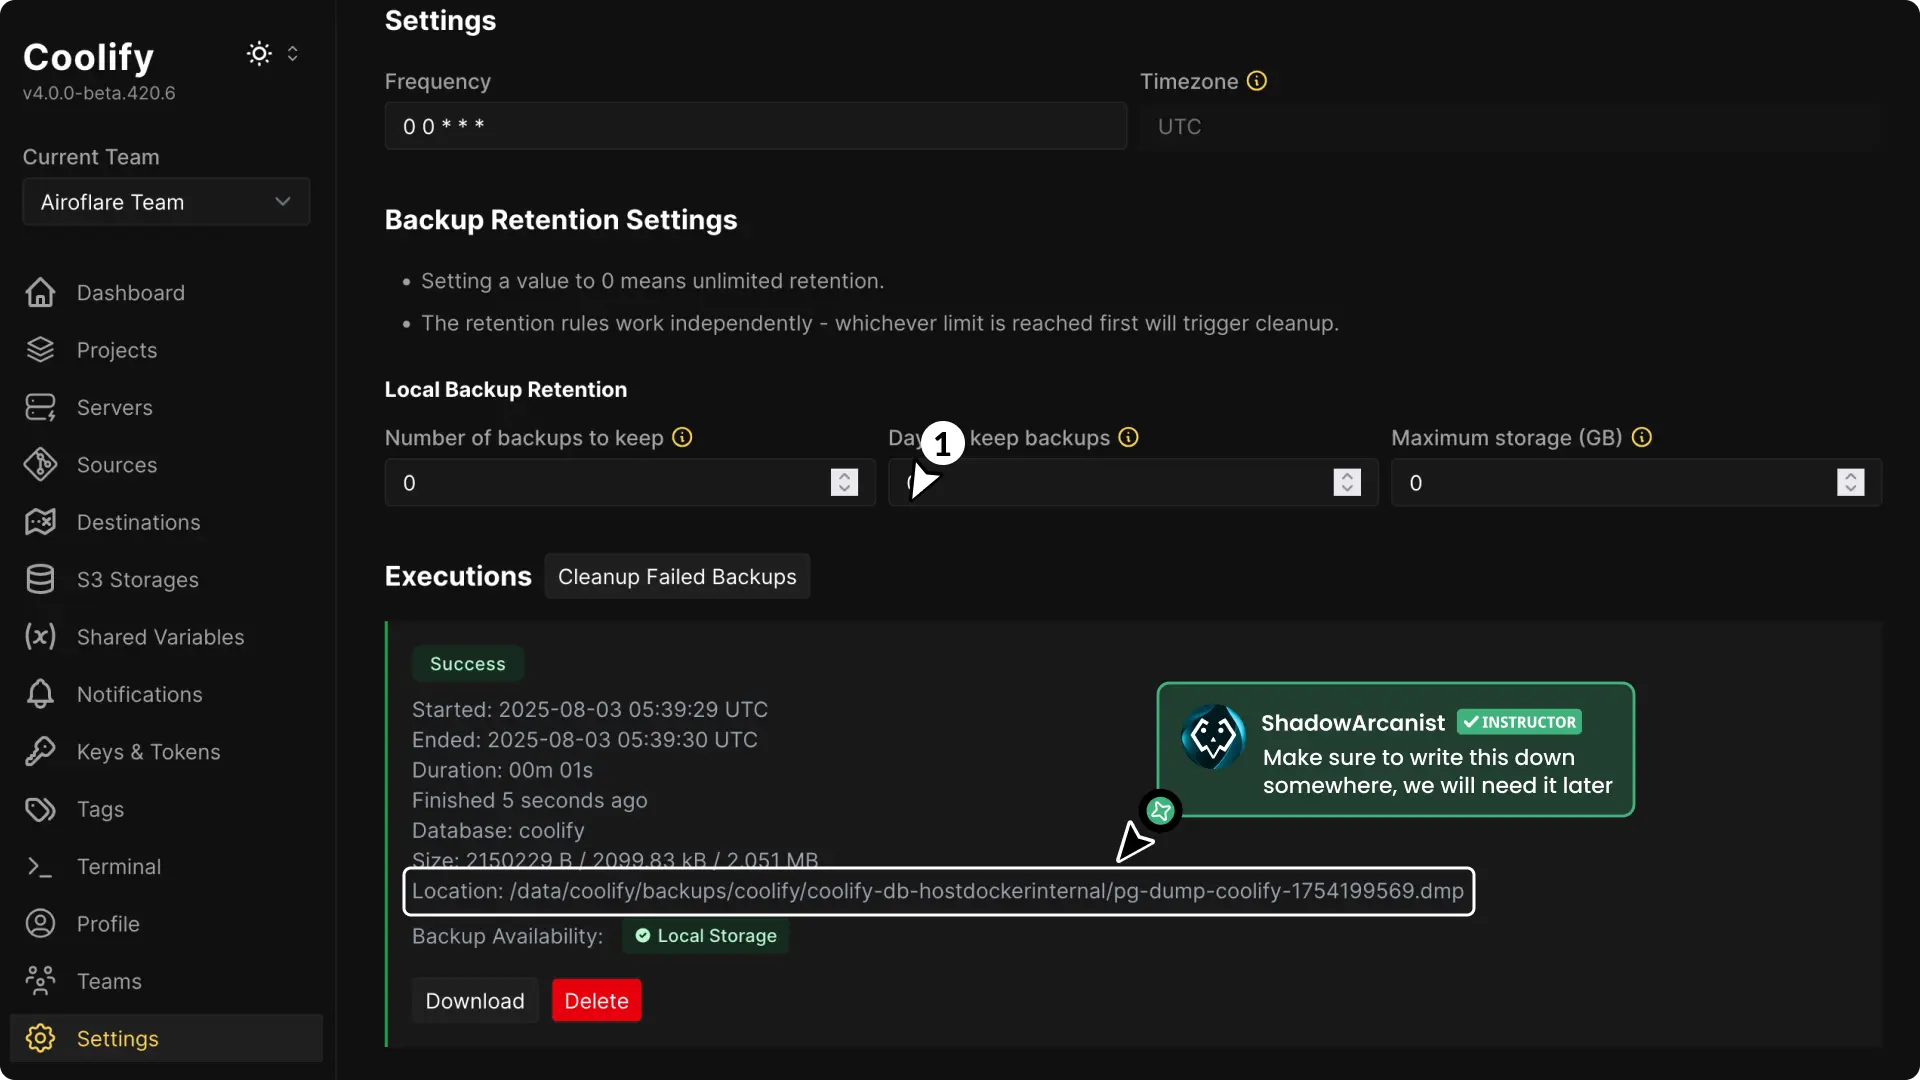
- Once the backup is done, the UI will show a download button and the backup's file path.
- Copy this path and save it. You will need it later.
3. Run the Migration Script
To simplify the migration, we created a script that automates the process. It handles transferring files, installing Coolify on the new server, and restoring your data.
Follow these steps on your old server:
Create the script file
SSH into your old server and create a file named migration.sh:
Paste the script
Open migration.sh in a text editor and paste the following code:
Set up SSH access
The script needs to connect from your old server to your new server using SSH. Make sure you have an SSH key on the old server that can access the new server.
Configure the script variables
Before running the script, you must update the variables at the top to match your setup:
NEW_SERVER_IP: The IP address of your new server.NEW_SERVER_USER: The user account for your new server (e.g.,root).NEW_SERVER_PORT: The SSH port of your new server (usually22).NEW_SERVER_AUTH_KEYS_FILE: The path to theauthorized_keysfile on your new server (e.g.,/root/.ssh/authorized_keys).SSH_PRIVATE_KEY_PATH: The path to the private SSH key on your old server that can access the new server.LOCAL_AUTH_KEYS_FILE: The path to theauthorized_keysfile on your old server.BACKUP_FILE: The full path to the Coolify backup file.
Run the migration
Execute the script:
The migration will take a few minutes. Once it's done, you will see a Migration completed successfully message. You can then access your restored Coolify instance at http://<NEW_SERVER_IP>:8000.
Note
The migration script does not copy the contents of the /data/coolify/proxy directory. If you have custom proxy configurations, you will need to copy them manually.
4. Migrate Your Applications
This script only migrates the Coolify instance itself, not the applications you have deployed.
To migrate your applications, you need to move their data manually. Follow our separate guide for that: Migrate Applications.
Support
If you run into issues, join our Community Discord server and ask for help in the support channel.