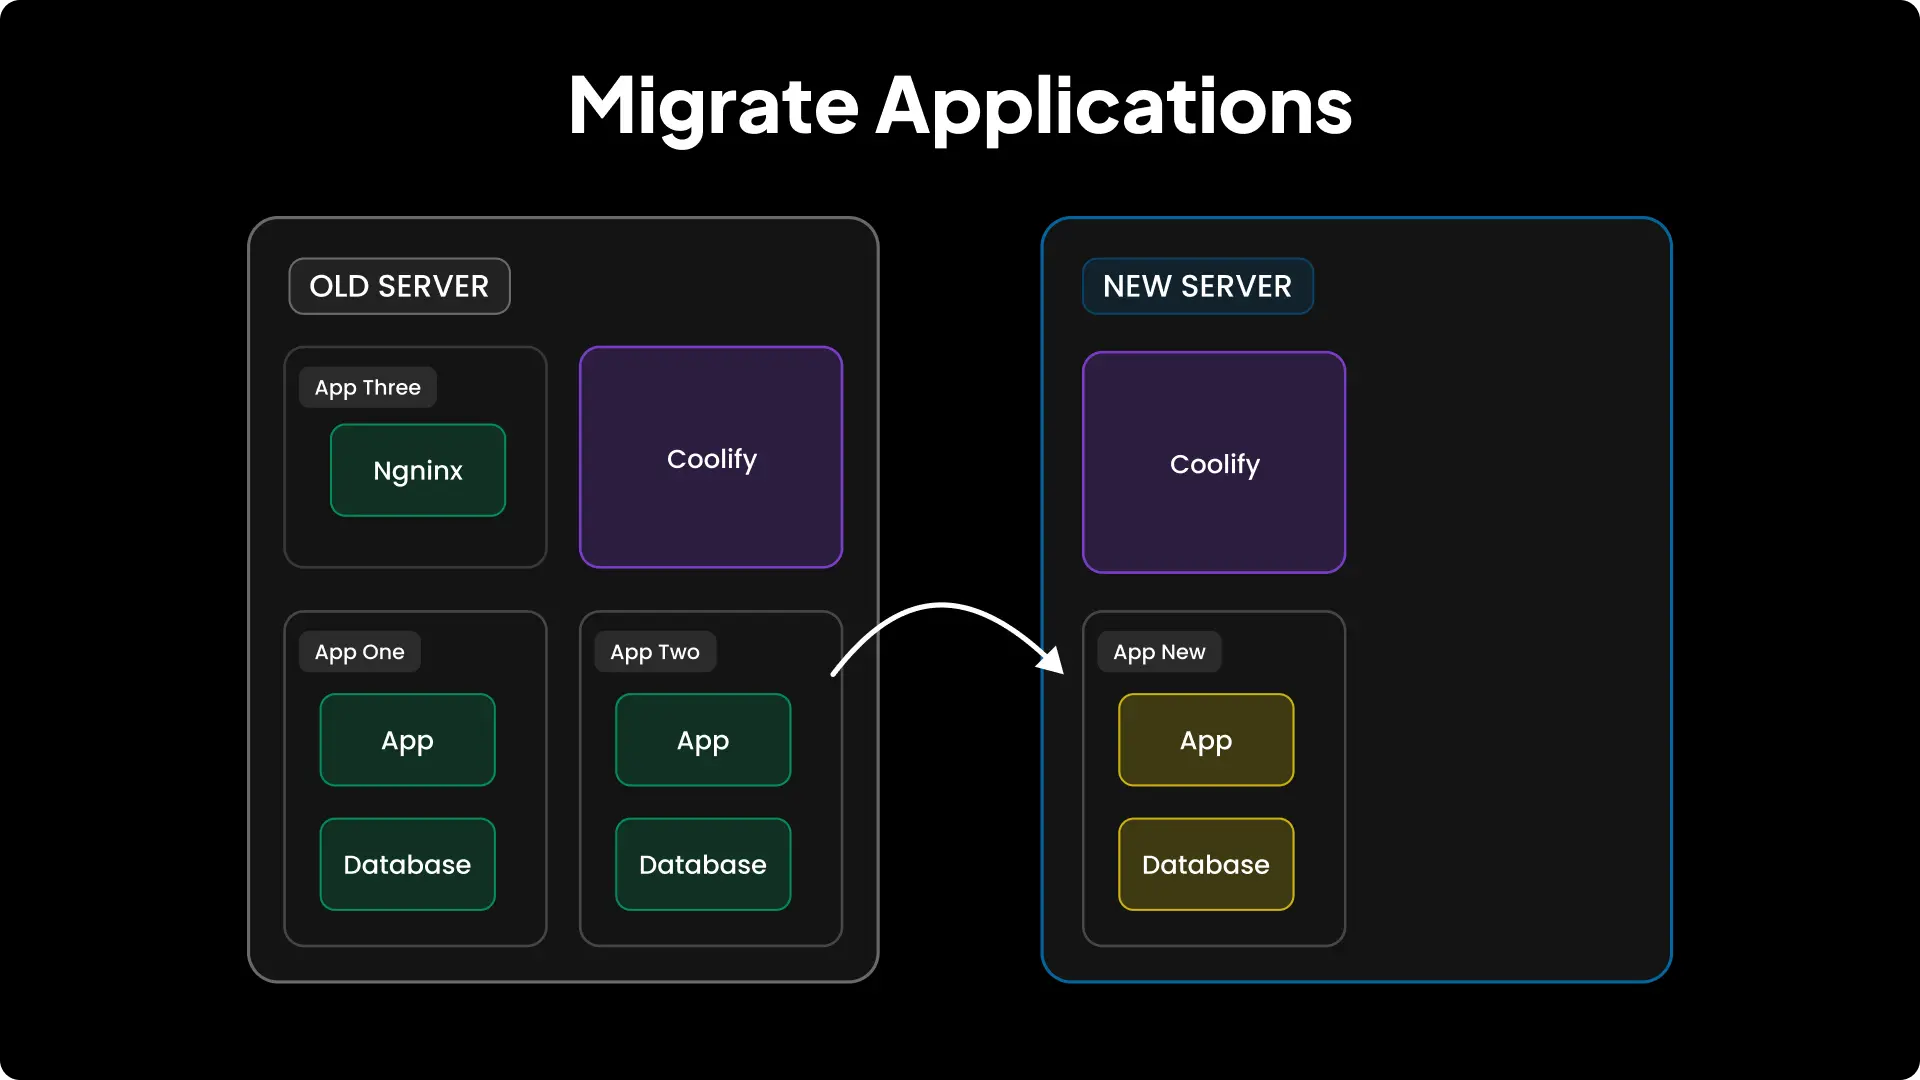
Coolify does not provide a built-in option to migrate applications from one server to another.
You have to manually deploy your app on the new server and copy over your databases and volumes. This guide walks you through that process step by step.
Note
We assume you already have Coolify installed on your destination server and are ready to migrate your app.
1. Understand Data Persistence
When using Coolify, application data lives in one of two places:
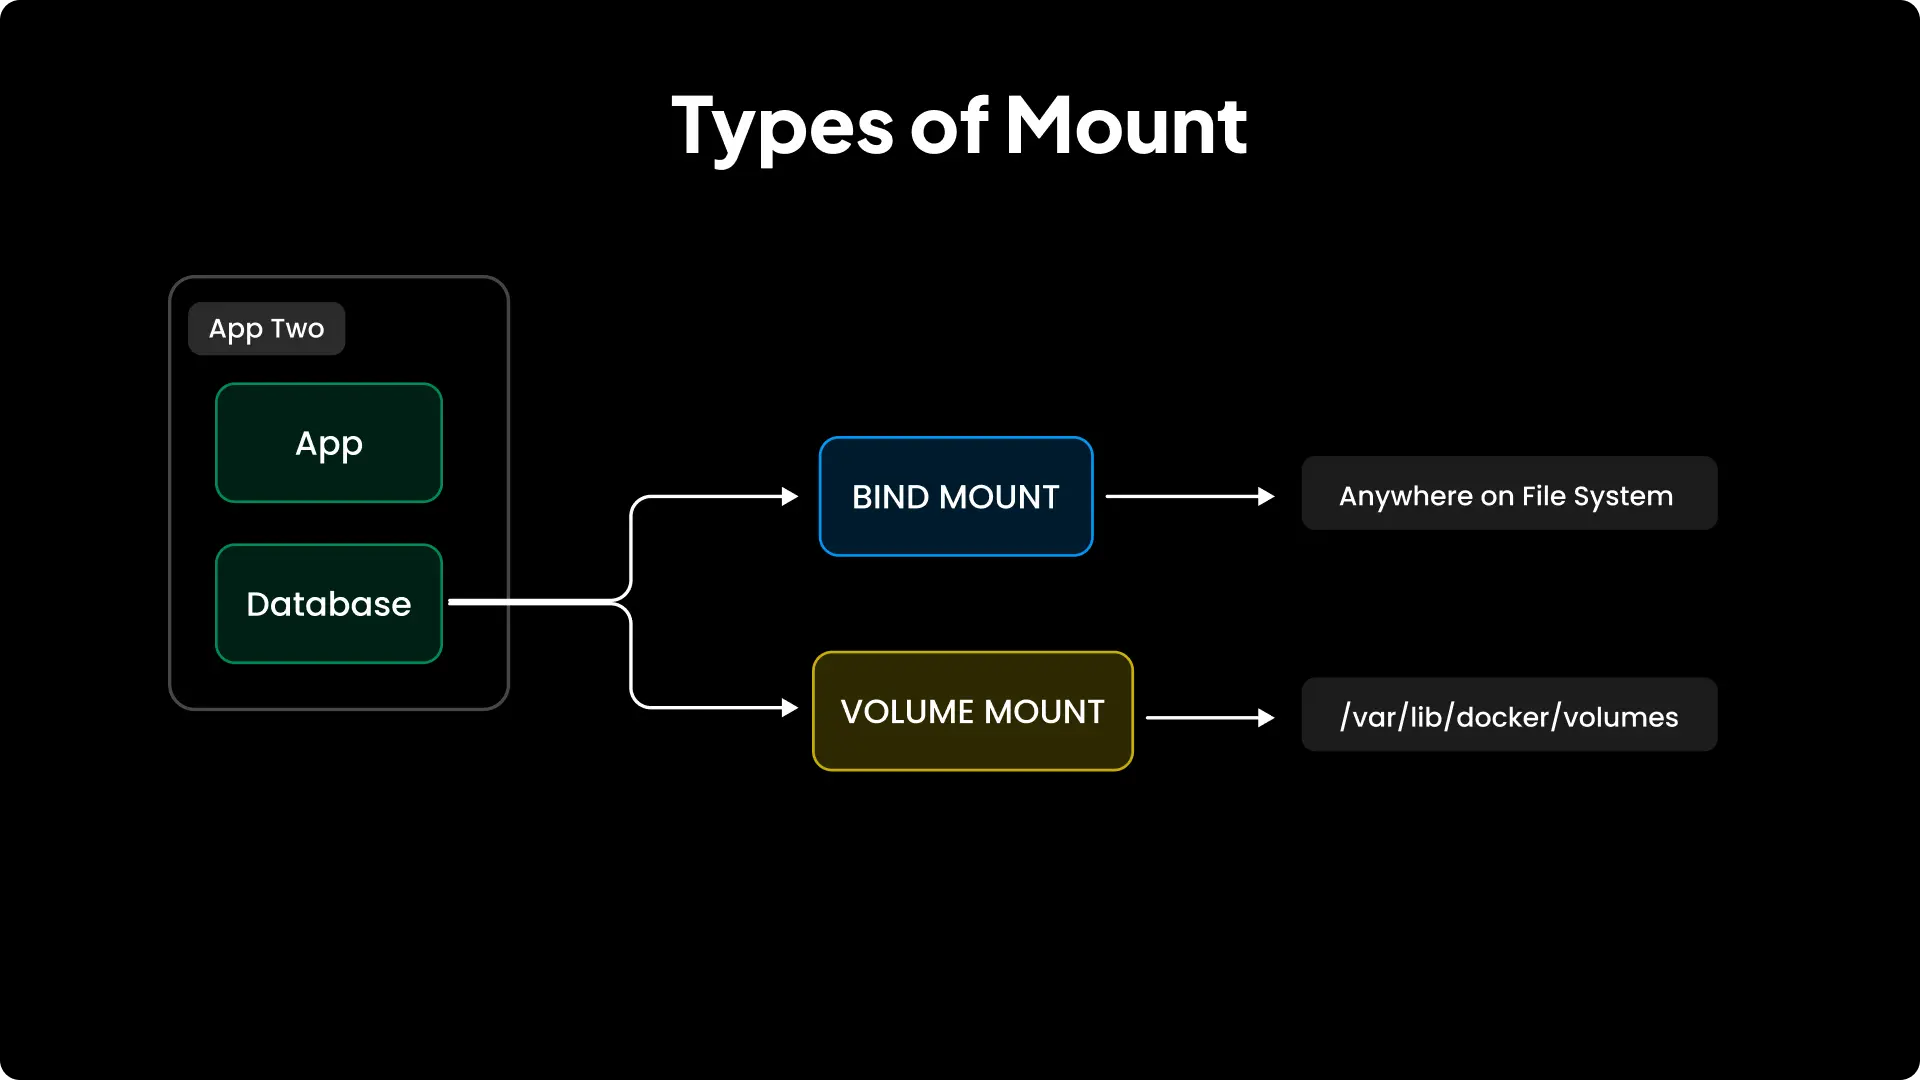
Bind mounts
- When using bind mounts, a host directory or file is mapped into the container.
- Any changes made to the directory or file on the host will immediately reflect inside the container.
- To back up data, simply copy the host directory or file to the new server and update the bind-mount path in your application’s configuration.
Volume mounts
- With volume mounts, a Docker volume is created (Coolify usually creates the volume, but you can also set it up yourself.) and used to store application data.
- The volume is stored in Docker’s volume directory, typically under
/var/lib/docker/volumes/<VOLUME_NAME> - You can’t just copy that directory directly, instead Docker provides a safe backup-and-restore method using a temporary container.
Note
Since bind mounts are simple to migrate by copying files directly, this guide will focus primarily on volume backups.
2. Backup and Restore Overview
The Docker-recommended process for volume migration looks like this:
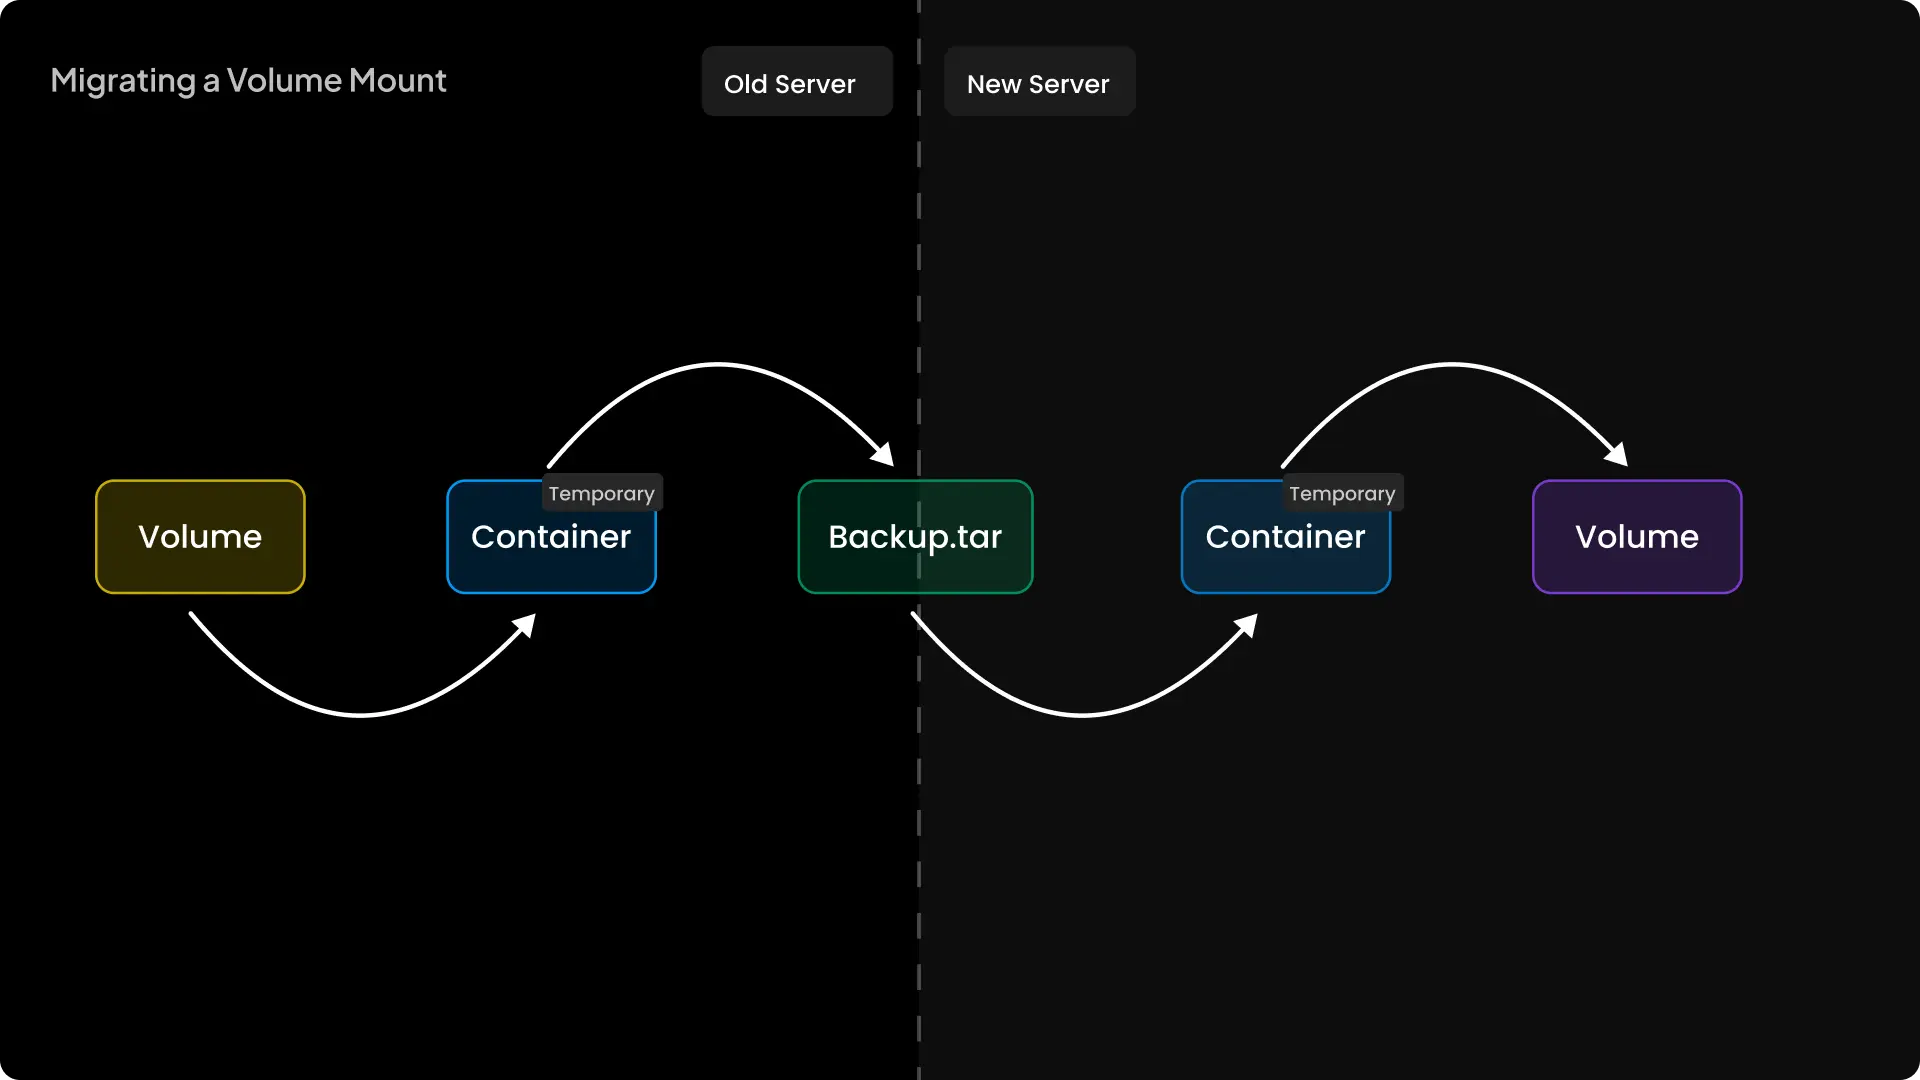
- Mount your volume into a temporary container.
- Archive the volume’s contents into a tarball.
- Copy the tarball from the container to your host and then delete the temporary container.
- Transfer the tarball to the new server.
- Create a fresh volume on the destination.
- Mount the transferred tarball into a temporary container.
- Extract the archive into the new volume.
This series of steps ensures a consistent, safe backup and restore. Below, we’ll provide ready-to-use scripts and detailed instructions.
3. Backup the Volume
-
SSH into your server where you have the Docker volume.
-
Create a script named
backup.sh: -
Open
backup.shin your editor and paste the following:backup.sh -
Find the volume name by running:
Or from Coolify’s Persistent Storage page (see below).

-
Stop your application to perform a clean backup.
-
Run the script:
- When prompted, paste the volume name.
- Press Enter to accept the default backup directory (
./volume-backup), or type a custom path.
-
Verify that you now have a folder (e.g.,
volume-backup) containing<VOLUME_NAME>-backup.tar.gz.
4. Transfer the Backup to the New Server
If you already know how to manually transfer the backup file, feel free to move on to the next step.
-
Create a second script named
transfer.sh: -
Open
transfer.shin your editor and paste the following:transfer.sh -
Adjust the variables at the top (
SSH_IP,SSH_USER,SSH_KEY,DESTINATION_PATH) to match your new server. -
Run the transfer:
- If key-based authentication succeeds, the backup folder copies over via SCP.
- Otherwise, you’ll be prompted for the SSH password.
5. Restore the Backup on the New Server
Note
In this example, we’ll use Umami Analytics (PostgreSQL) to show how you restore a database-backed app. Adjust paths and volume names for your own database.
-
Deploy your application on the new server with Coolify, then stop it so volumes will be created but won't be in use.
-
SSH into the new server and create a script called
restore.sh: -
Paste the following into
restore.sh:restore.sh -
Run the script:
- Enter the volume name (from
docker volume lscommand or Coolify's Persistent Storage page). - Press Enter to accept
./volume-backup, or type a custom backup path. - Enter the backup filename (e.g.,
umami_postgresql-backup.tar.gz). - Confirm you want to proceed by typing
y.
- Enter the volume name (from
6. Start Your Application
Once the restore finishes, go to Coolify’s dashboard and click Deploy.
Your application should now use the migrated data. If it does not, or if logs show errors then repeat the restore step to ensure all files copied correctly.
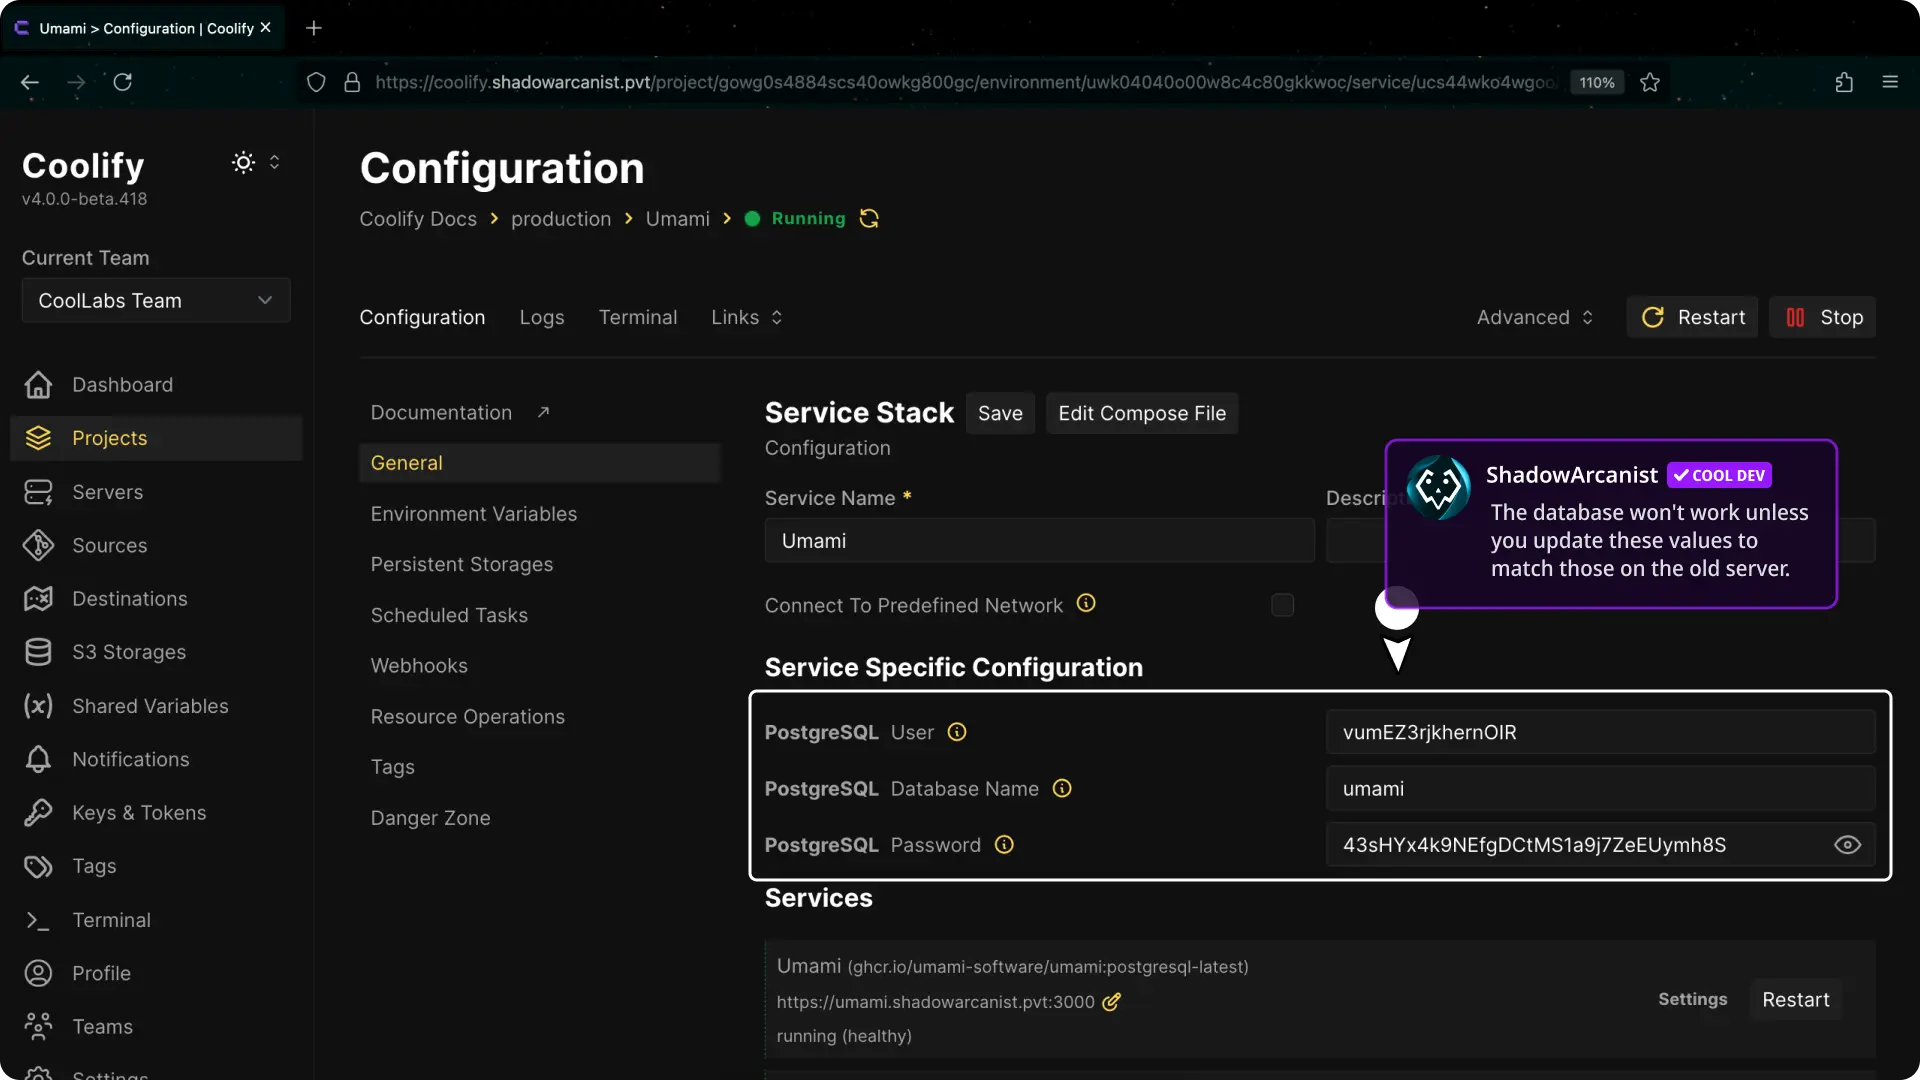
Note
If the database credentials (username, database name or password) are different on the new server, update them in Coolify’s dashboard to match those from the old server.
Support
If this guide doesn't resolve your issue, please join the Coolify Discord server and seek assistance there.